


Many wonder "How Do You Make Die Cut Mylar Bags?" To make a custom die cut mylar bags, design a custom shape with a die line, then manufacture a steel rule die to match. After printing your design onto film rolls, the die stamps out the unique bag shapes, which are then finished with features like zippers before final quality control.
Mylar bags can be die-cut in many different ways to represent your brand rather than just being contained in a rectangular bag. Die cut Mylar bags allow you to create unique shapes other than just a rectangular pouch, which gives your products more personality, increases shelf appeal, and improves the customer experience.
This guide will provide step-by-step instructions on how to create a die-cut Mylar bag that represents your brand. In this process, you will sketch out the initial idea for your bag and go through all of the required steps until you are completely satisfied with the finished product.

What Are Die Cut Mylar Bags?
Prior to discussing the method of creating die cut mylar bags, it can be beneficial to understand what they are. Essentially, a die cut mylar bag is a pouch in a custom shape as opposed to the standard square or rectangular shape. This creation utilizes an extremely sharp tool referred to as a die that has been made specifically for your custom design.
To put it more simply, a die is an oversized cookie cutter that is extremely heavy, strong and precise (usually made from a rigid steel rule and housed in either a wood or metal block). The die cuts through a laminated roll of mylar film, allowing you to create your custom shapes (e.g., round corners, complex and intricate shapes).
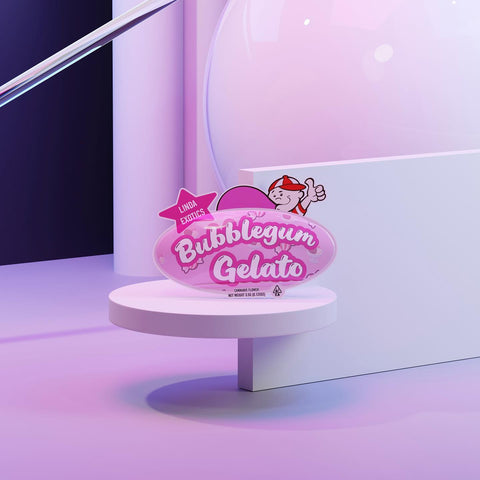
View die cut mylar bag examples here.
Why You Choose Custom Shaped Mylar Bags
There are some really powerful reasons to make an investment into creating die cut, custom-shaped bags:
• Quick Visual Recognition: A unique shape allows customers to easily recognize your product when many similar items are on a shelf. Take the shape of a Toblerone box or Coca-Cola bottle for example.
• Enhance Value Perception: The use of unique die-cut, custom-shaped packaging communicates a higher level of perceived value; it tells the customer that every detail, big or small, has been considered, indicating a higher-quality product inside.
• Functional Improvements: The actual cut of the die adds functionality to the packaging. For example, the shape can provide a built-in handle for convenient carrying, allows the top to be curved, enabling much easier access, or helps provide additional support to keep the bag upright.
• Product Differentiation: In a competitive marketplace with many look-alike products, the use of Die Cut Bag provides you with a unique edge which helps you to stand out and grab the customer's attention.

Quick Overview
Here is a concise, step-by-step breakdown:
- Design: Create your custom shape and a technical "die line" template.
-
Tooling: A custom steel rule die is manufactured based on your template.
-
Print: Your artwork is printed onto rolls of Mylar film.
-
Cut: The die stamps and cuts the printed film into your unique shape.
- Finish: Features like zippers are added, and the bags undergo quality control.
The 11 Steps to Creating Your Ideal Die-Cut Mylar Bag
Have a fantastic idea for a mylar bag? Use this detailed guide to help you create your own custom mylar bag step by step.
Step #1 - Define the Bag's Purpose and Specs
Before getting started on design sketches, you need to set out what the bag will be used for and what its specifications will be like. All future design decisions will be based on these details and serve as a foundation for all design-related decisions.
- Type of Product: What will you put inside the bag? A solid product (i.e., nuts or cereals) will behave differently than a liquid product (i.e., juice) and thus require different materials and seals.
- Dimensions / Volume of Bag: What are the specific dimensions needed to hold your product? You must account for both headspace (empty space at the top of the bag that will be sealed) along with the volume that will hold your product (i.e. if the headspace is 1.5 inches long, you will want to make sure that your product will still be sealed tightly when filled to the top of the headspace).
Closure Type: Do you need to have ordinary heat seals, resealable zippers, or a tear notch? These items must be integrated within the die cut design.

Step #2 - Select the Right Material to Use
"Mylar" is actually a brand name for BoPET (Biaxially-oriented polyethylene terephthalate); however, most bags today consist of a number of materials, which may include complex laminates. It is critically Important that you select the proper material to protect your product from harm and retain its quality.
Metalized Film: Metalized films offer an excellent barrier against moisture, light and oxygen, and have the traditional shiny "Mylar" look.
- Transparent Film: Customers can see the contents inside their package. This is especially appealing for visually attractive products such as colorful candies or artisanal tea types.
- Kraft Paper Finish: A natural, rustic or eco-friendly option.
- Thickness Of Film: Thickness is measured in mils or microns. Thicker films (5 mil or greater) tend to be more durable & puncture resistant, making them suitable for heavy or pointed objects. Thinner films are flexible & less expensive than thicker films when used for lighter items.
Step #3 - Create Your Custom Shape/Artwork
This is where your creativity will be utilized. Collaborate with a designer or use design software to generate the shape of your bag.
- Achievable Design: While you can get creative, avoid excessive intricacies in a design. Each design contains areas of thinness that may tear or may not have adequate corner radius due to the specific requirements of the die-cutting process.
- Branding Considerations: Consider your logo placement on the shape of the bag. Can the shape become a continuation of the graphic?
- Flat and Filled States: Understand that the 2-dimensional shape created on screen will now be a 3-dimensional object. How will the graphics be displayed across the sides and the bottom of the bag? Your designer will produce a die line indicating the exact placement of where the bag would be die cut.
Step #4 – Create the Die Line Template
The Die Line Template will be the most important technical component of your custom design and will be a vector-based template (typically created through Adobe Illustrator) which will act as your cut path from the die.
Make Sure the Die Line Clearly Shows:
- The Cut Line
- Any Fold Areas
- Any Seal Areas
- Any Zipper Areas
- Any Hang Hole Areas
All important printed elements of your design (like text or logos) need to be located inside a "Safe Zone" typically 3mm away from the cut line.

Step #5 - Finding a Qualified Packaging Manufacturer
The majority of printers do not offer die cutting. You need to select a qualified manufacturer that has the proper equipment to meet your needs.
When looking for a custom mylar bag manufacturer, be sure to check their:
- Experience in producing custom bag shapes
- Minimum order quantities (MOQ)
- Samples of their previous die cut mylar pouch work
Step #6 - Manufacturing the Custom Die Mold
The most expensive aspect of die cutting will be the creation of your custom die. To manufacture your custom die, your die line template must be approved to have the custom die manufactured.
- The Way It Works: A technician will take an accurate steel rule into the shape of your bag, place it onto either a plywood or aluminum base, and will subsequently install it onto a cutting press (known as a die).
- The Cost & Time Frame: The die can take anywhere from several days to weeks to create and can range in price from several hundred dollars to over a thousand dollars depending on complexity and size, therefore, this is your investment for a unique package.
Step #7 - Utilize the Roll to Print Your Design
After the die has been manufactured, the next step of the process is to print your entire color design onto large rolls of the laminate film you selected. The most typical types of printing processes for flexible packaging are:
- Rotogravure: For extremely long quantities, this is one of the best methods due to its outstanding (consistent) colors and fine details.
- Flexography: This method offers you a cost-effective option; however, it tends to be more suitable for lower to moderate quantities.
Step #8 - Setting Up the Die Cutting Machine
The laminated film is loaded onto a die-cutting machine; the die will then be installed on the machine, and the machine will be calibrated to ensure proper registration. The registration process is when the die must be positioned to cut exactly on the die line provided, while at the same time, cutting the laminate film relative to the printed design.
Step #9 - Die-Cutting in Action
This is when the real magic will happen. The continuous web of printed film is fed through the press by this machine while the enormous die cuts cleanly through the full thickness of all the layers of the film with a considerable amount of force, cutting out the individual bags. The extra material that is created from this process, the matrix or waste, is removed from the bags and disposed of, leaving the finished die cut bags as they are connected and ready to be stacked in succession as a web.

Step #10 - Add Special Features, If Required
The bags can be made with further customizations after the material is cut.
- Heat Sealing: Once bags are made from the above procedure, they are ready to receive product and be heat sealed.
- Zippers & Tear Notches: A machine that applies zippers to the top of the bag will do so before the bag is folded and sealed for bags that need to be resealable.
- Gussets: A gusset will be created as part of the designing process for gusseted side and/or bottom fill bags.
Step #11 - Final Quality Control and Inspection
Your custom die cut bags go through a thorough quality control inspection before they are packed and shipped. This inspection involves checking the following:
- Clean Cuts: Is the cutting done cleanly with no jagged edges or rips in the bag?
- Accurate Registration: Is the cut in alignment with the printing?
- Structural Integrity: Is the seal correctly formed & is the fold correct?
- Consistency: Do the bags match the approved sample?
After all of the items listed above pass the QC inspection, your custom die-cut Mylar bags are packaged and shipped, filled with your product, to be sent out into the world!

So, How Do You Make Custom Die Cut Bags?
To make die cut Mylar bags, you start by designing a custom shape and creating a precise die line template, which is used to manufacture a custom steel rule die. Your artwork is then printed onto large rolls of film, and the die stamps through the material to cut out each unique bag shape. Finally, any special features like zippers are added, and the finished bags undergo quality control before being shipped.
Conclusion
Die-cut, custom Mylar bags are the development from an idea to a shelf-ready product. Although the fabrication process requires a series of technical procedures such as creating die lines, and a considerable investment in a custom die, this will yield great returns. You should not only create a bag but also create a marketing tool that will enhance your product, attract your customers and separate your product from your competitors. So, begin drawing your design, find a manufacturing partner, and begin building your brand.
2 comments
Are the custom shaped bags resealable?
Thank you
Leave a comment